Unlock Stunning Photos: Discover the Secret to Perfect Lighting!
The importance of lighting in photography cannot be overstated. Good lighting can transform an ordinary photo into a stunning image. Whether you're capturing portraits, products, or creative scenes, the right lighting can enhance your subject's features and add depth to your composition. In this article, we will explore the benefits of using a studio lighting kit and how it can elevate your photography skills. Having a well-set lighting arrangement not only improves your image quality but also provides you with the flexibility to achieve various styles and moods. As a friend once told me, "The right lighting is like a magic wand for a photographer." With this in mind, let’s dive into the world of studio lighting kits!

Understanding Studio Lighting Kits
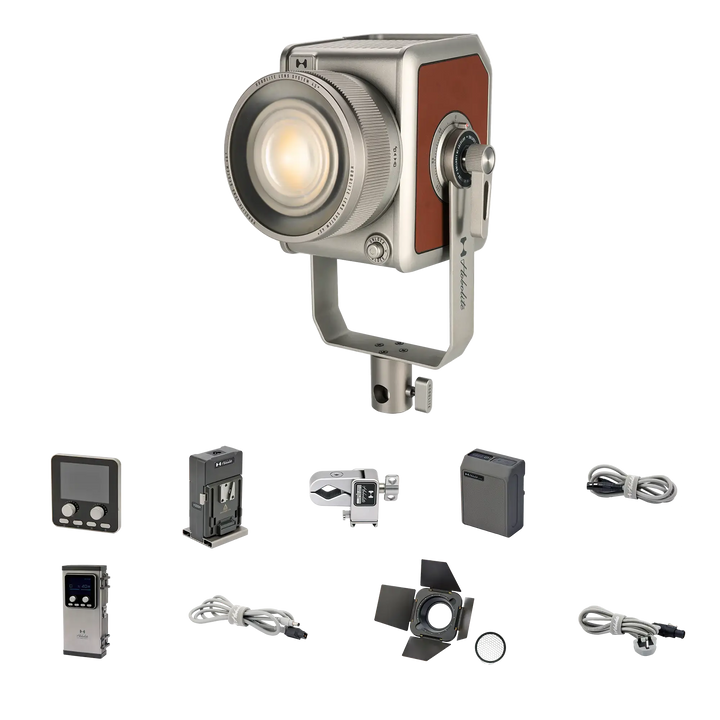
A studio lighting kit typically includes various essential components such as softboxes, light stands, and reflectors. These kits are designed to provide controlled lighting conditions that can significantly improve the quality of your photographs. The primary purpose of a studio lighting kit is to create a consistent and adjustable light source that helps to eliminate harsh shadows and highlights, which are common in natural lighting. There are different types of lighting available, including continuous lighting and strobe lighting. Continuous lighting offers a constant source of illumination, allowing photographers to see how the light affects their subject in real-time. On the other hand, strobe lighting emits bursts of light that freeze motion, making it ideal for high-speed photography. Understanding these components and their effects on your images is crucial for any photographer looking to enhance their craft.
Benefits of Using a Studio Lighting Kit
Using a studio lighting kit comes with numerous advantages that can elevate your photography. First and foremost, it greatly improves image quality. With proper lighting, colors appear more vibrant, details are sharper, and the overall aesthetic of the photograph is enhanced. Additionally, studio lighting kits provide consistency in lighting, which is particularly beneficial when shooting a series of images. This consistency ensures that your photos have a uniform look, making them more professional. Moreover, with a studio lighting kit, you gain creative control over your shooting environment. You can manipulate shadows and highlights to create specific moods or effects, giving your work a unique flair. A friend of mine, who is a professional photographer, swears by their studio kit, claiming it helped him land several high-profile clients due to the quality of his work.
Choosing the Right Studio Lighting Kit
When selecting the best studio lighting kit for your needs, there are several factors to consider. First, evaluate your budget. Studio lighting kits come in various price ranges, and it's essential to find one that offers good quality without breaking the bank. Next, think about the type of photography you intend to pursue. For instance, if you're primarily shooting portraits, you might need soft lighting options, whereas product photography may require more precise lighting control. Additionally, consider the space available for your setup. If you have limited room, a compact kit with adjustable stands and collapsible softboxes might be ideal. My cousin recently faced this dilemma when he wanted to set up a home studio in his small apartment. He found a compact lighting kit that fit perfectly without overwhelming the space, allowing him to take stunning product shots.
Setting Up Your Studio Lighting Kit
Setting up your studio lighting kit correctly is vital for achieving the desired results. Start by positioning your lights at angles that complement your subject. A common technique is the three-point lighting setup, which involves a key light, fill light, and backlight. The key light is your primary light source, while the fill light softens shadows created by the key light. The backlight adds depth by illuminating the subject's background. Adjusting the brightness and distance of each light can help create a balanced look, ensuring that no area is too harsh or too dim. Additionally, using reflectors can help bounce light back onto your subject, filling in shadows and adding dimension. A fellow photographer I know once shared that experimenting with different setups led to her discovering unique lighting styles that became her signature.
Common Mistakes to Avoid with Studio Lighting
Even seasoned photographers can make mistakes when using studio lighting kits. One of the most common errors is neglecting to adjust the light intensity, which can result in overexposed or underexposed images. It's essential to take test shots and tweak the settings before the actual shoot. Another mistake is placing lights too close to the subject, which can create harsh shadows and unflattering highlights. Instead, maintain an appropriate distance and use diffusers to soften the light. Additionally, failing to consider the background can detract from your subject. Ensure that your lighting complements the background, enhancing the overall composition. A friend of mine learned this lesson the hard way during a shoot when she discovered that her bright lights were casting unwanted reflections on the background, distracting from her stunning model.
Enhancing Your Photography Through Proper Lighting
In summary, a studio lighting kit is an essential investment for anyone serious about photography. By understanding the components and benefits of these kits, choosing the right one for your needs, and mastering the setup, you can dramatically improve your photography skills. Remember to avoid common mistakes to ensure your lighting enhances rather than detracts from your images. Investing in a quality lighting setup opens up new avenues for creative expression and can help you capture breathtaking photographs that truly stand out. So why wait? Dive into the world of studio lighting and unlock the full potential of your photography!


